
With table service, a table stays open for the whole meal: your staff add products as service goes on, the kitchen receives the order, and the bill is paid at the end.
Video coming soon
1Turn on table service
In the back office, open Settings › Till and switch on Table service. It applies to your devices straight away; there is no save button. Switched off, the till takes payment immediately, like a counter.

Important — Table service (floor plan, tables, kitchen screen) is part of the Pro plan. On Starter, the switch stays greyed out and a See the Pro plan link appears below it.
2Draw your floor plan
Open Catalogue › Floor plan. Start with Add an area — Dining room, Terrace — and pick its shape: rectangle, square or round. Five areas at most. Then add your tables one at a time with Add a table, or all at once with Create a run: numbers 1 to 8, four seats each, for example.
Drag each area by its name, resize it by its corner, put the tables where they belong, then click Save the plan. Until the plan is saved, the till keeps showing the old one.

Tip — A table out of use? Click it and untick Visible on the till: it leaves the till without being deleted.
3Choose what goes to the kitchen
In Catalogue › Categories, each category now has a Preparation field: Kitchen screen, Bar screen or None — served straight away. Dishes go to the kitchen, drinks to the bar, and a croissant taken from the counter goes nowhere.
4Open a table at the till
At the till, staff enter their PIN: with table service on, the Floor screen opens straight away. Each table in use shows what is left to pay, how long it has been open, and the server's colour. Tap a free table, then add products as for any other sale. For a customer in a hurry, Direct sale takes payment without a table.

5Send the order
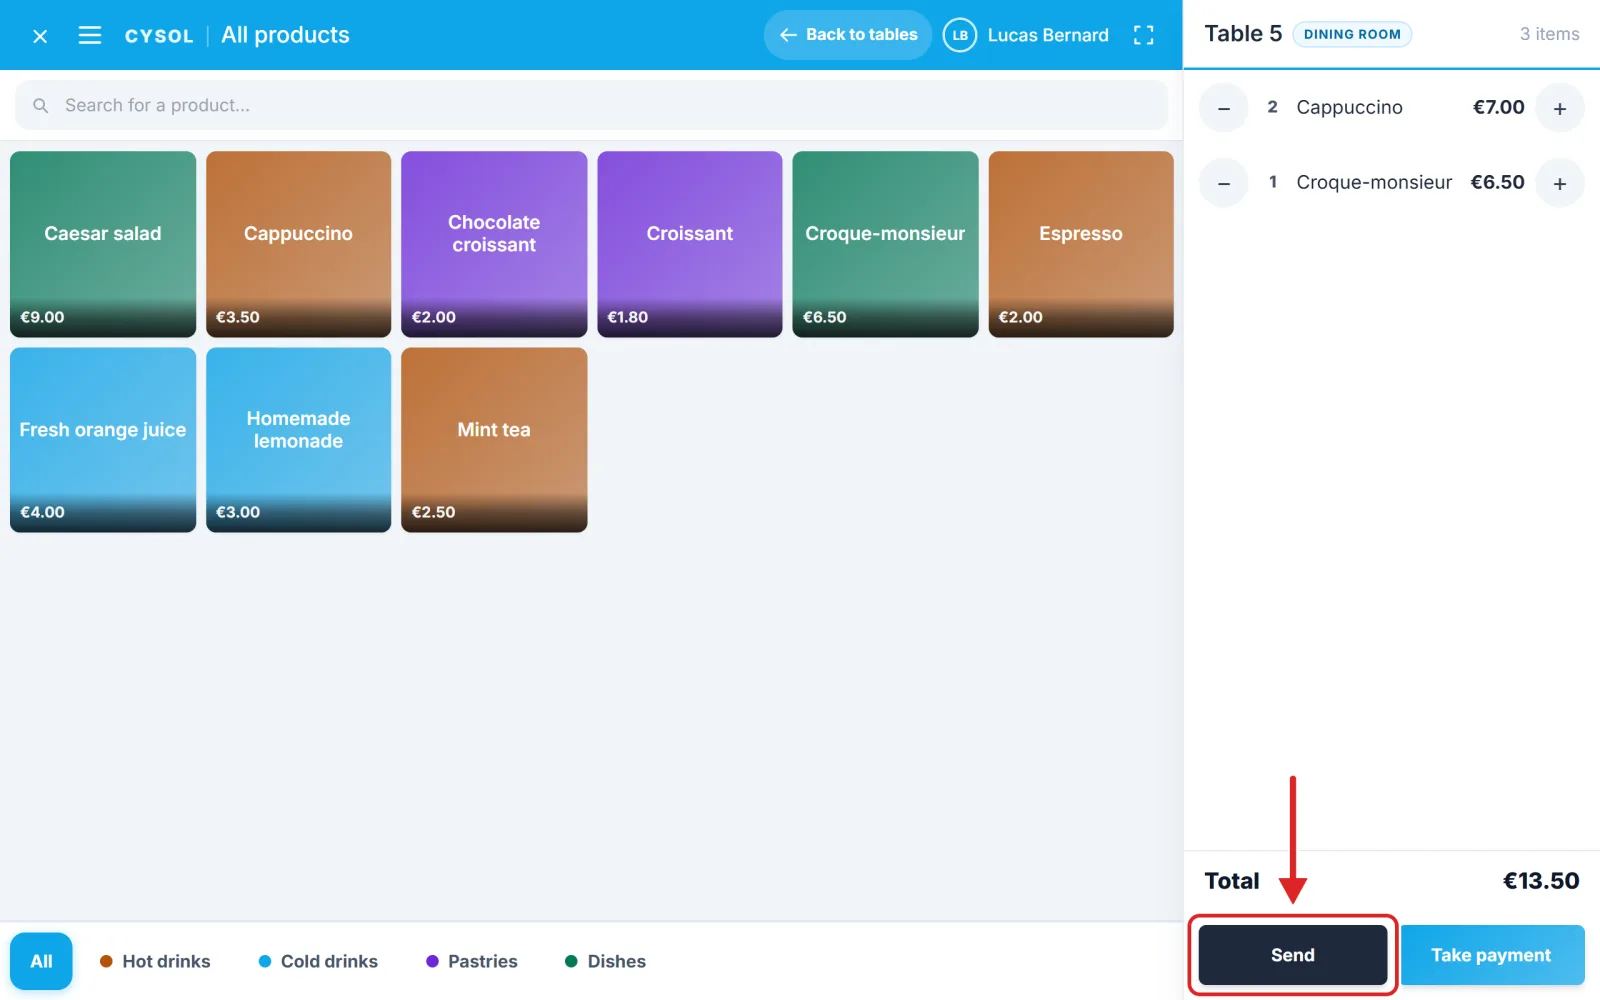
Tap Send: the order is saved on the table and goes to the kitchen or the bar, depending on its categories. If Kitchen docket is on under Settings › Printed ticket, a docket also comes out of the printer. The till then returns to the staff selection screen, ready for the next colleague.
For dessert, reopen the table, add it and tap Send again: only what is new goes to the kitchen. Something already sent can no longer be removed with a simple "−": the till asks for a reason, and for a supervisor's code if the staff member does not have that permission.
6Take payment
When the customer asks for the bill, reopen the table and tap Take payment. Choose the payment method, enter the cash received, then Confirm: the ticket prints, the table is freed and the till goes back to the floor.
The till's ☰ menu holds three more actions, for those allowed to use them: Split the bill, Move the order and Cancel the table.
Tip — A table belongs to the staff member who opened it. A colleague sees whose it is before touching it, and a supervisor can take it over with their code.