
Your products are what the till shows and sells. By the end of this guide, you will know how to set up your categories, create a product with its price and photo, and take it off sale when you need to.
Video coming soon
1Pick your starting categories
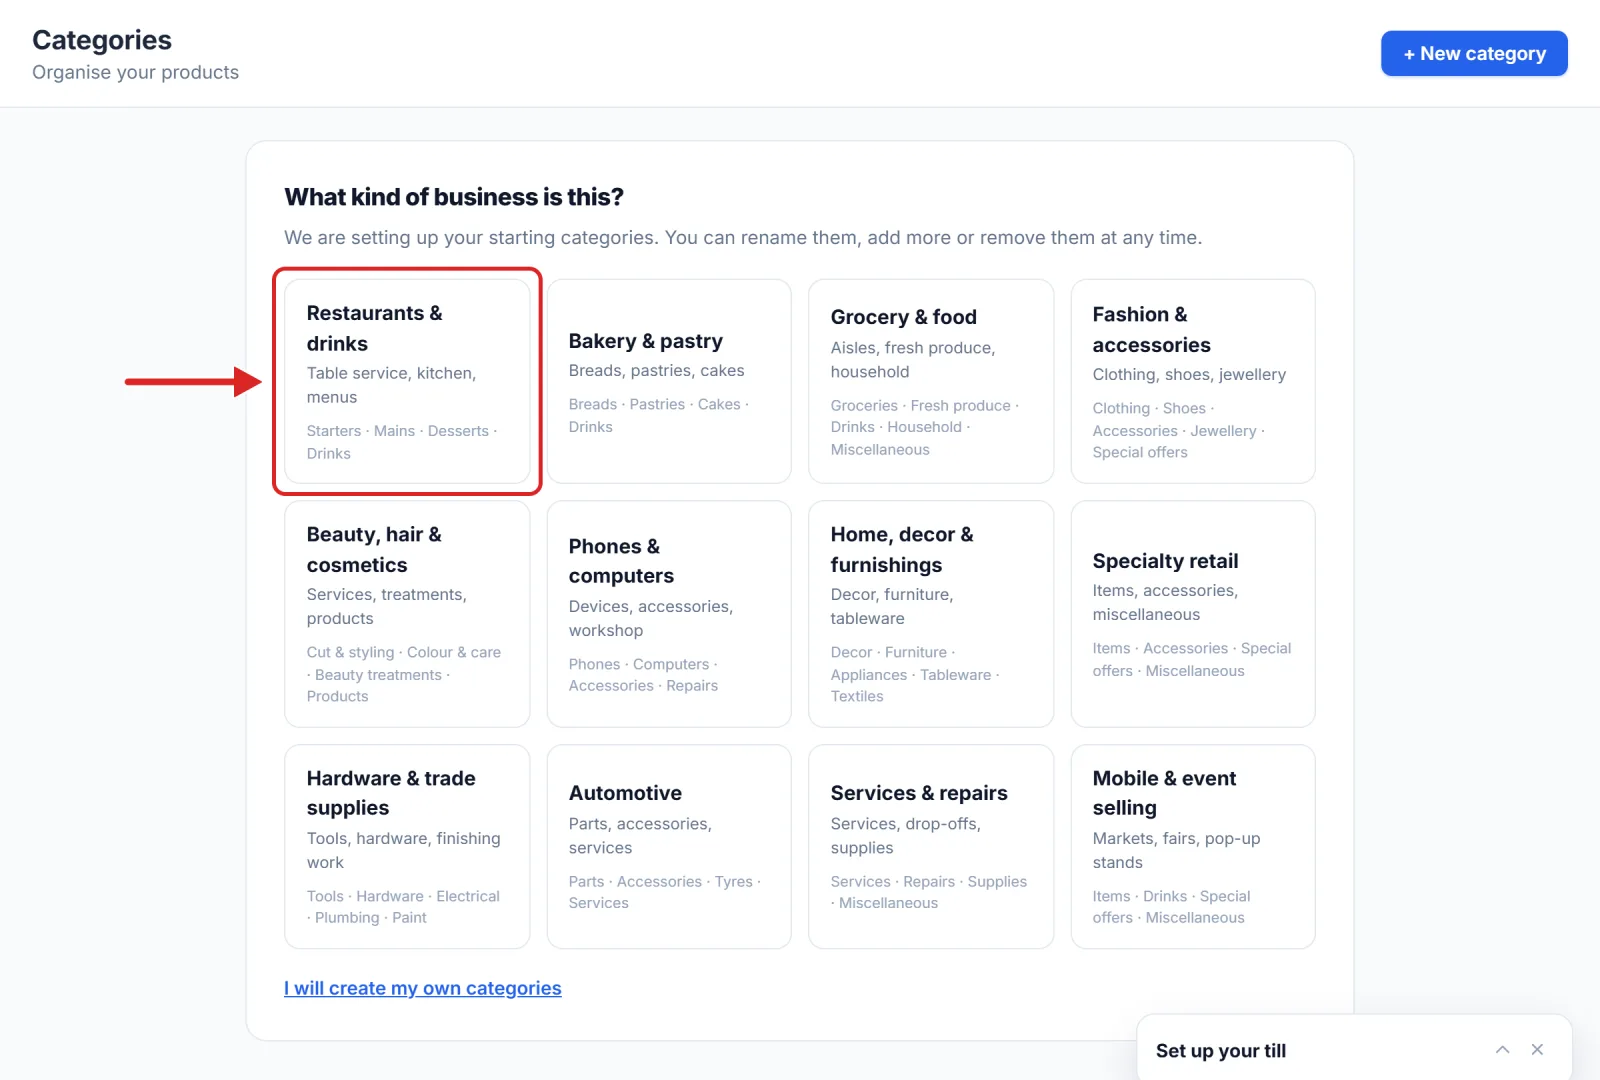
Open Catalogue › Categories. The first time, the screen asks What kind of business is this? Pick yours: your starting categories are created in one click, and you can rename them, add more or remove them at any time. None of the choices fits? Click I will create my own categories.
2Add or edit a category
Click + New category. Give it a Name, a Colour — the dot on its tab at the till — and an Order, which sets its place among the others. Leave Active ticked, then click Save. To edit an existing category, just click its row.
Tip — With table service (Pro plan), each category also says where its orders go: Kitchen screen, Bar screen or None — served straight away.
3Create a product
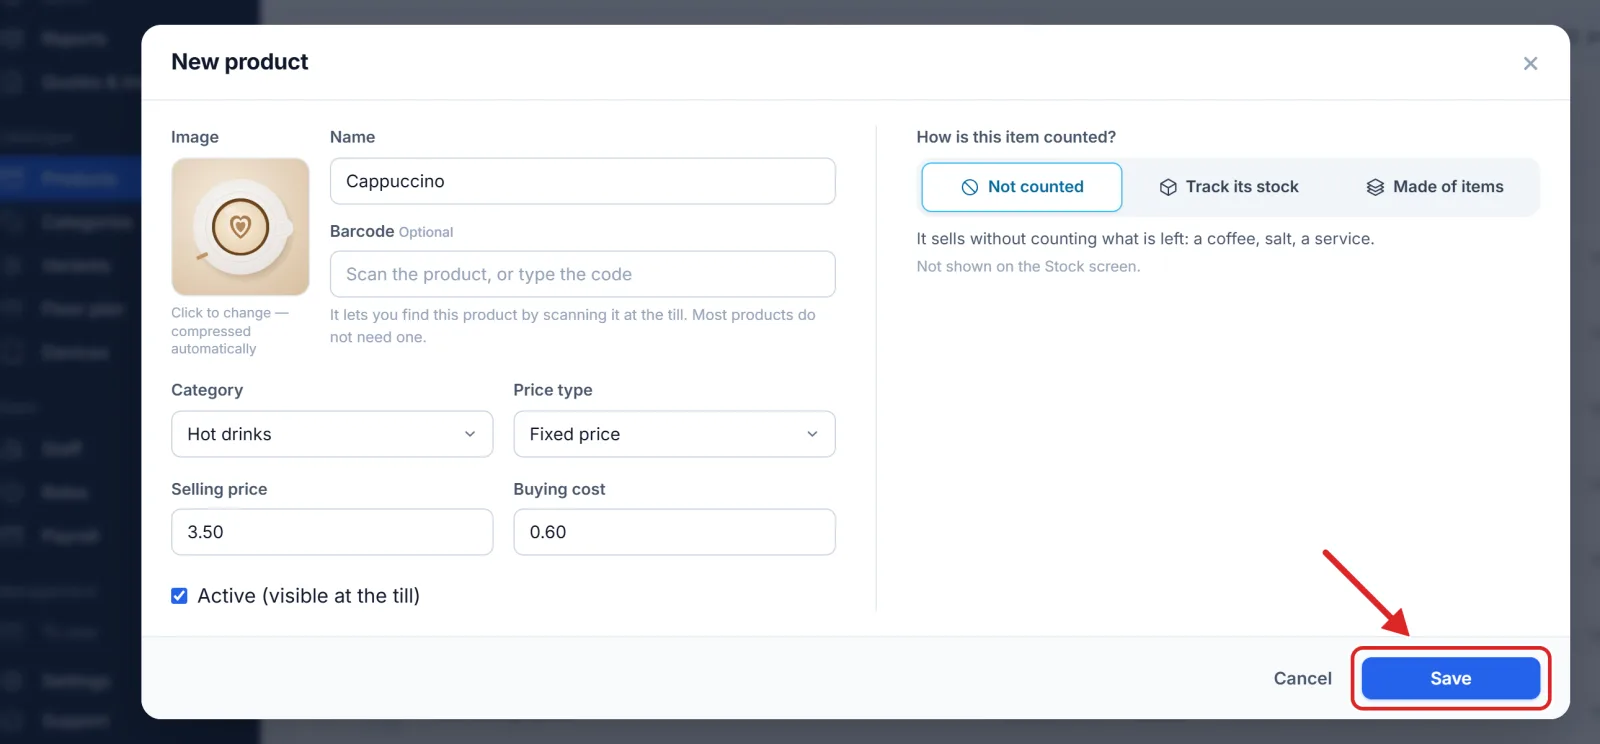
Open Catalogue › Products and click + New product. Fill in the Name, choose the Category, then enter the Selling price. The Buying cost is not required, but it is what lets CYSOL work out your margin.

The Price type is set to Fixed price, which suits most products. Choose Open price (entered at the sale) when the amount changes every time: the price is then typed in at the till.
4Add the barcode, if the product has one
The Barcode field is optional, and most products do not have one. When the product carries one, it lets you find it at the till by scanning it. With a barcode scanner, click in the field and scan: the code is typed for you. Without one, open this page from your phone or tablet and tap the icon at the end of the field: the camera opens, hold the barcode inside the frame, and the code is filled in as soon as it is read.

Important — The same code cannot be on two products: if it is, the form says so in red, with the name of the product that already has it. On a computer, the button does not open a camera: it asks you to use a barcode scanner, and Use the barcode scanner puts the cursor in the field.
5Add a photo
Click the Image thumbnail at the top left of the form and choose a photo: it is compressed automatically. Click the thumbnail again to change it.

6Save
Leave Active (visible at the till) ticked and click Save. While something is missing, the button stays greyed out and the reason shows in red next to it — for example Required: Name. Within a minute, the product joins its category's tab on the till. To edit it later, click its row.
Taking a product off sale
There are two ways, depending on what you need. Untick Active (visible at the till) to hide it for a while: it stays in your list. To remove it for good, click × at the end of its row and confirm: the product is archived, it disappears from the till, and its sales history stays intact.
Important — A category that still holds products cannot be deleted: move or archive its products first. The category marked Account category never shows on the till: it collects the products created from your expenses and purchases.
Tip — Lots of products to enter? The Import button reads an Excel or CSV file and shows you, row by row, what will be created before anything is saved. To offer choices on a product — a size, how it is cooked — see Catalogue › Variants. Stock tracking is part of the Pro plan.